In a previous article, I discussed the various bandwidth sharing cash apps you can install on a Raspberry Pi or other ARM based single board computer (SBC) or x86_64 based Mini PC, and today I am going to discuss how to actually install the EarnApp cash app on any Linux device, ARM64 or x86_64. **Full disclosure, all links to EarnApp and other cash apps contain my referral links, so that I can make an extra few percent on top of your earnings (with or without using my referral link, you still make the same amount).
First, you’re going to need an ARM SBC or x86_64 Mini PC, and for this task I highly recommend using the lowest wattage device possible, the Raspberry Pi Zero 2W, which idles at 1W! As you may know, electricity costs seem to be going up all over the world, especially in Europe, so keeping your expenses down is a must in order to maximize profits! While there are other options available, such as a repurposed Android TV box with Linux freshly installed, such as those found on AliExpress, a Raspberry Pi 3B or 4B with at least 1GB of RAM are also quite adequate for running this software, as are any cheap Intel based Celeron devices. In fact, while Intel based Celeron devices (x86_64) use slightly more energy, they have far less compatibility issues when other cash apps such as Honeygain, Packetstream, Peer2Profit, IPRoyal Pawns, and Traffmonetizer are also installed. For any device you choose, I recommend a minimum of 512 mb of RAM (which is what a Raspberry Pi Zero 2W has standard), with 1 GB of RAM being ideal for other SBC’s, and 16 GB of drive space (or eMMC / SD card if you’re using an ARM based SBC).
All instructions will be identical for either kind of computer architecture you chooose, ARM or x86_64, however, if you intend on running Honeygain on a Raspberry Pi or other ARM SBC, make sure to install EarnApp first prior to installing Honeygain and it’s x86_64 QEMU emulator from my Honeygain install guide, as it may install the x86_64 version instead of the ARM64 version due to the presence of the emulator. Okay, let’s begin.
To install the Linux based operating system, you’re going to need an imaging program, such as Rufus, Balena Etcher, or the Raspberry Pi Imager, and use either a USB memory stick or SD card and reader to flash them with whichever OS you choose. For new users, I suggest picking a server version of Debian Linux, Ubuntu Linux, or Raspberry Pi OS (DietPi OS works too), an x86_64 version for Intel and AMD devices, and an ARM64 version (also known as AArch64 or ARMv8) for a Raspberry Pi or other ARM based SBC. There are many guides, blogs, and videos you can look up for how to install a server based OS onto a PC or ARM SBC, so I will not bore you with the details here.
I also recommend setting your cash app home Linux server on your guest WiFi connection, to separate traffic and prevent any security or privacy breaches that might arise from using bandwidth sharing apps. While I want you to make some decent coin, I’m also hoping you do so by staying private and secure; because devices vary significantly, I will leave this up to you to figure out though. For more advanced techy types who have an Ethernet port on their home server, you may choose to setup a VLAN on a router of your choice, and run your cash app server through it instead.
Now that you have Linux installed on your Raspberry Pi, ARM SBC, or Mini PC, and now that you’ve setup the networking on it, you’ll need to log into the console or open up an ssh session into your device, but I recommend running it from an ssh session to make it easier to use the link and register your device in your EarnApp account. From ssh, run the following command (copy/pasted from EarnApp’s website):
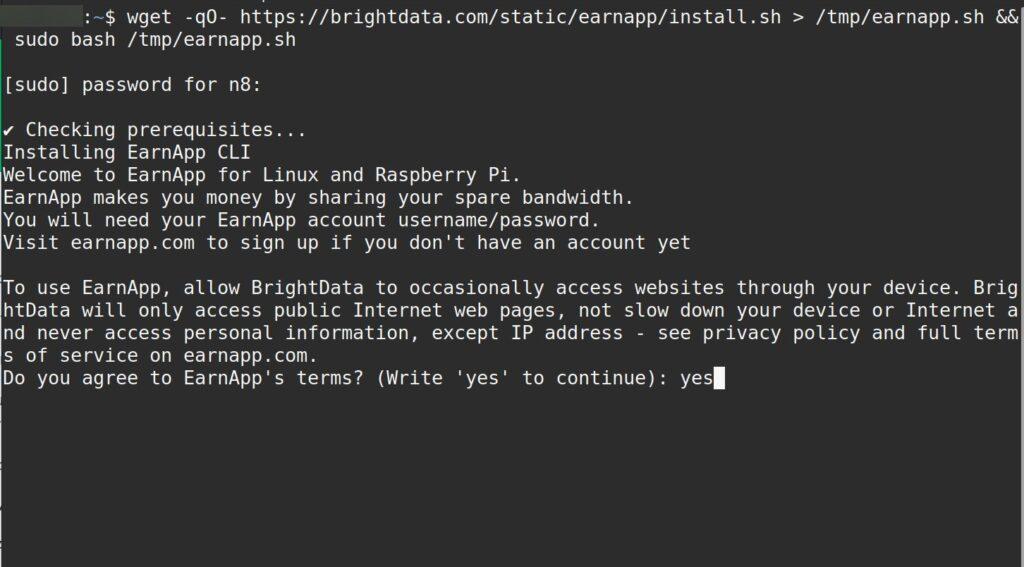
wget -qO- https://brightdata.com/static/earnapp/install.sh > /tmp/earnapp.sh && sudo bash /tmp/earnapp.shType “yes” and press <Enter> to agree to EarnApp’s TOS:
If it installed correctly, you should see something like this:
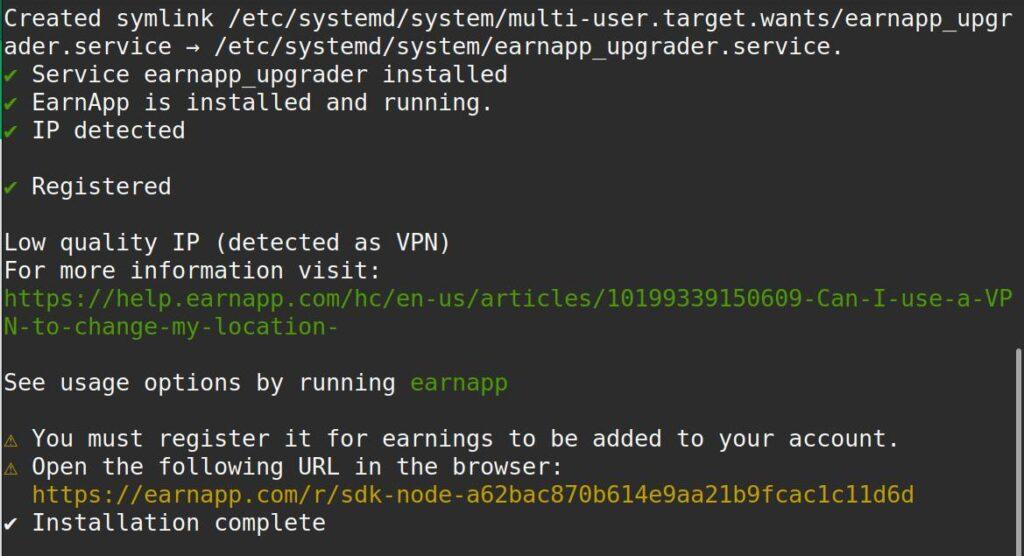
On the computer that you are using to ssh into your Linux server, log into EarnApp via a web browser. After you’ve logged into EarnApp, right click the URL at the bottom of your terminal session (see graphic above) and either copy and paste it into your browser, or select “open link”. Once your device is registered with EarnApp, in your EarnApp dashboard, right click the pencil icon next to your new device and name it to something that will distinguish it from other devices, such as using your server’s host name.
That’s it! You’re now running EarnApp on your very own home Linux server. While you’re not going to break the bank anytime soon, at least you’re going to profit a little bit more on the spare bandwidth you have from your internet connection, and that’s a great step in the right direction.
To see a comparison of all of the cash apps that I have found and use, and all of the details associated with each program, feel free to check out my original article on the topic:
Passive Income: Bandwidth Sharing Apps on a Raspberry Pi, Phone, or PC
1 thought on “How to Install EarnApp on a Raspberry Pi or Mini PC!”